Installing Linux From Scratch To Save The World
Stand up to abusive software services and the entities behind them that track and control us. This is the year for a mass exodus to free & open source operating systems and software...
Watch the guide on Odysee
Watch the guide on 3Speak
Its time to take the leap. If you don't know why you would erase Windows/macOS and switch to Linux, read the article where we break down how those operating systems spy on and control their users.
You will need the following for this tutorial:
- a USB flash drive that can hold 4GB or more
- a windows computer (not a Mac) that is 64bit (most computers made after 2008 are 64 bit)
If you need to get a Windows PC, follow our article to get a Linux Ready Machine.
![]()
Teebot wants you to follow us on these alternative social platforms:
Official #TakeBackOurTech Community
Telegram Channel
Telegram Discussion
Odysee
Hive
Minds
Disclaimer
We cannot accept any liability for the contents of this document. Operating system installations are sensitive operations that should be performed at your own discretion. Use the concept, examples, and other content at your own risk.
Although this is highly unlikely, the author does not and can not take any responsibility for any damage to your system that may occur as a direct or indirect result of information that is contained within this document.
You are strongly recommended to make a backup of your system before major installation and adhere to the practice of backing up at regular intervals.
BACK UP YOUR STUFF
Whatever you do, please practice data safety and gather all the important data on the computer before proceeding. You will lose all of this data if you do not, along with the existing operating system and programs installed.
General Recommendation
- Pickup an older Windows computer or buy one.
- Make sure your computer has a 64 bit architecture (how to check below)
- Check if your computer is on the Ubuntu Certified Hardware list.

Pre-Requirements
- USB with at least 4GB of space
- Your data needs to be FULLY backed up on other computers or USBs (not involved in the installation)
- A target Windows computer, not a MacOS computer
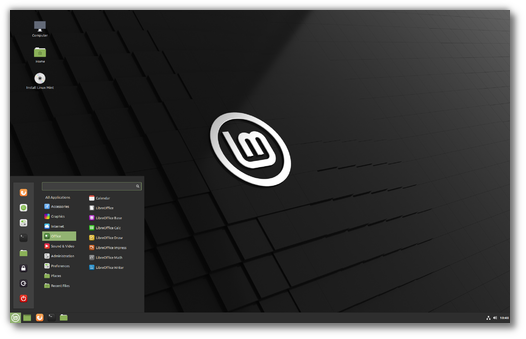
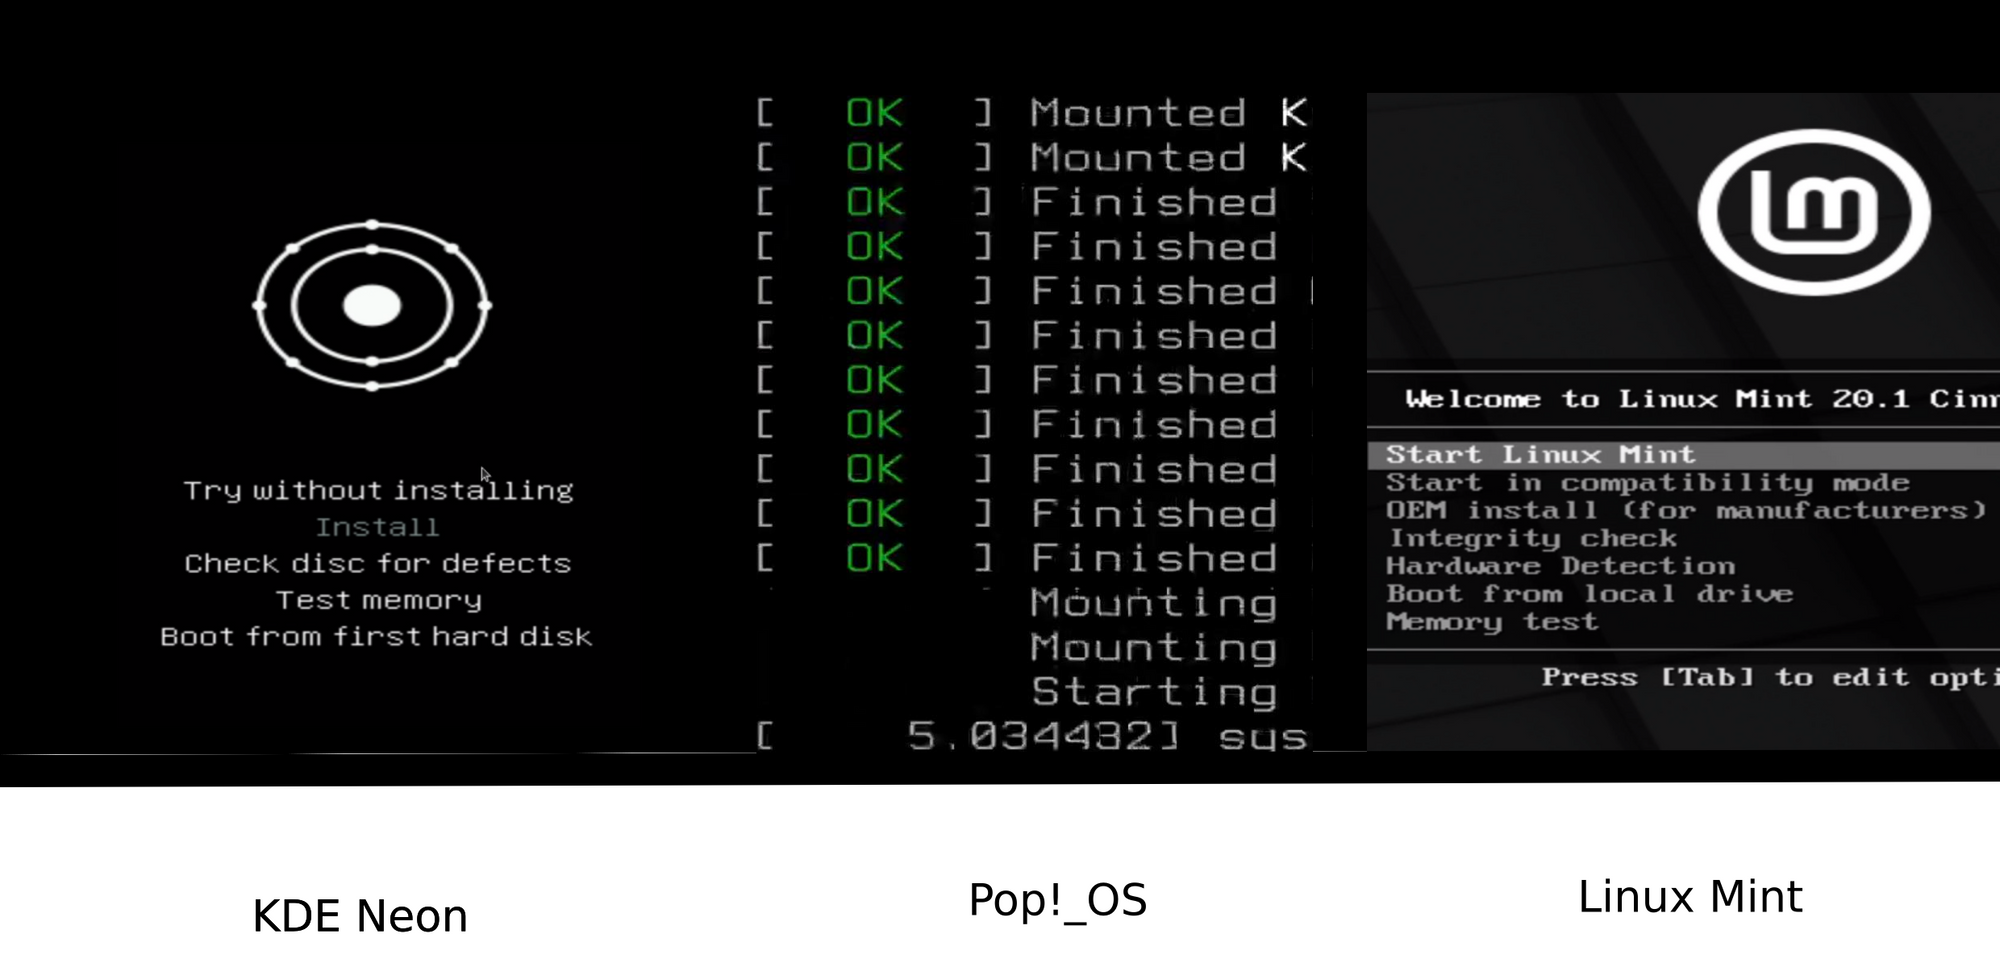
- A chosen Linux operating system, we like the ones below:
 KDE Neon team
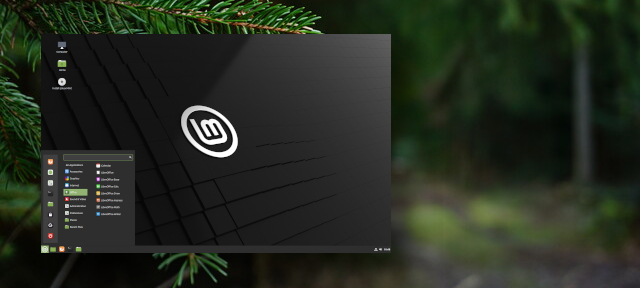
OPTIONAL: Researching Compatibility
- If you have a pre-built computer, figure out your specific model, or get the vendor and manufacturing year.
- Then you can search it at linux-hardware, where people have submitted their computer's probes - which check to see whether various device drivers work.
 Andrey Ponomarenko
If you find your device, you'll see probes per specific operating systems. These may be the same OS' you are planning to install, but can vary. Still, looking at the results of a probe gives you a good idea at what works and what might not.
Here's an example of a probe.
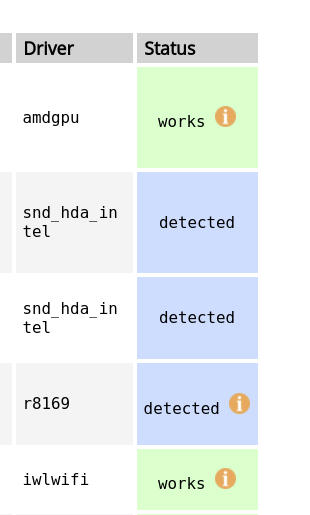
You'll see each device module listed inline with either 'works', detected, or 'malfunc'.
Works is obviously a good thing, detected means the device wasn't tested, 'malfunc' means the device did not work.
You may also see an orange info icon which indicates problems on other setups, or a comment icon that has more information. If you click into these notes you'll see what the device owner has to say about the issue.
This is all very helpful to check before you install Linux. You should pause and consider using another computer if you see issues with:
- graphics card
- sound
- network (ethernet controller / wireless adapter)
- storage
- cpu
- bios
- memory
- motherboard
If you're having trouble finding your laptop, you can use linux-laptop to find Linux installation guides, resources, and probes for your laptop.

If you still can't find your laptop, then a good last resort is just searching your computer's model alongside 'Linux' in your favorite search engine.
General Compatibility
The majority of computers will have things just work out of the box. Some machines might have special components that need drivers such as fingerprint readers, bluetooth modules, and touch screens. Sometimes these can be fixed by locating the correct driver, other times you may have to go without their functionality, or accept reduced functionality. However for the most part, all major components of your PC are well supported on Linux.
Preparing For The Installation
Do a final investigation of the computer that Linux will be installed on, our installation method will completely wipe the computer, replacing it with a new operating system. ALL DATA WILL BE LOST, this is why you must back the important data up.
Again, we cannot take any responsibility of damage to your devices, so please perform these steps at your own risk.
Check your computer’s CPU architecture, which dictates what kernel your operating system needs to be packaged with. The vast majority of the time you’ll have a 64 bit processor, unless your computer is older than 10 years.
You can verify your processor architecture by checking your OS version
Getting The ISO File
You have a choice between 3 reliable and practical operating systems based on Ubuntu, which is one of the most popular operating systems that has great compatibility across many types of computers.
We’ll first locate the installation media for the operating system, which is an .ISO file. This .ISO file is a virtual representation of a single disk image, and will contain everything needed to install the operating system.
Here are the direct links to the download pages for the operating systems we like, make sure to follow the instructions in the caption.
KDE Neon team
Preparing Installation Media
Now we can create a special USB with the .ISO file on it which will allow our computer to boot up into the OS installation environment.
You have a few options, but for simplicity’s sake we’re going to a program called Etcher which can be used on any operating system and is dead simple.
3 Steps, and you're done.
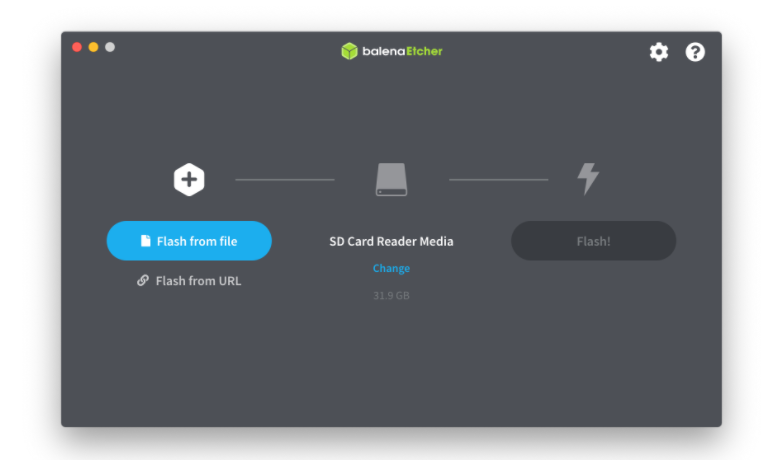
- First flash from file and locate the .ISO file for the operating system you want to install.
- Then select the USB you want to use as the install disk.
- Then start flashing, wait for it to finish.
You can now install that OS on any computer you have access to!
Installation
Now we will work through the process of getting into your BIOS (the lower level firmware that initializes your computer's devices for other software), and then enabling the usage of alternate boot devices (so that we can boot into our Live USB)
Getting Into The Boot Sequence and Disabling SecureBoot
- There is a special key sequence that can be pressed when turning on your computer to get into the BIOS menus. Take note of your computer's model, then search the internet for the following. BIOS Keys for "(your computer's model or motherboard model)".
- Depending on your computer manufacturer, keys can range from pressing 'Esc', 'F2', and 'F12', but all keys can be used. Look up your BIOS Key to save time.
- Once you've found the key sequence, you need to test it by turning off the computer completely, and then turning it on again. MAKE SURE YOU TURN YOUR COMPUTER FULLY OFF.
- Press the BIOS Key immediately as the computer starts.
- You should be brought into a menu. If you miss it and end up getting into Windows, just turn the computer off and on to try again.
- Once in the menu, look for a tab that mentions 'Boot'.
- If your BIOS uses UEFI, then look for a 'SecureBoot' option.
- If SecureBoot is enabled, disable it.
- If you see the FastBoot option, disable it.
- Make sure to look through the different menus using the instructions at the bottom of the screen and ensure you didn't miss anything.
Booting From USB After Secureboot Is Off
- Plugin your installation USB to the computer.
- Restart the boot sequence and press the BIOS Key once more.
- Now look for the Boot Order menu. This may be within the Boot menu, or you may need to restart the boot sequence to check within other menus.
- Edit the boot order so that your USB is the first device in the list.
- Now save & exit.
- Do not press anything on the next boot to go into your installation disk.
At this point you should boot into the Operating System and can begin installing.
It is recommended you Check the installation medium for defects (move using the arrow keys and press enter to select) before Installing Zorin OS.
If you have a Nvidia Graphics Card you can install with those proprietary drivers.
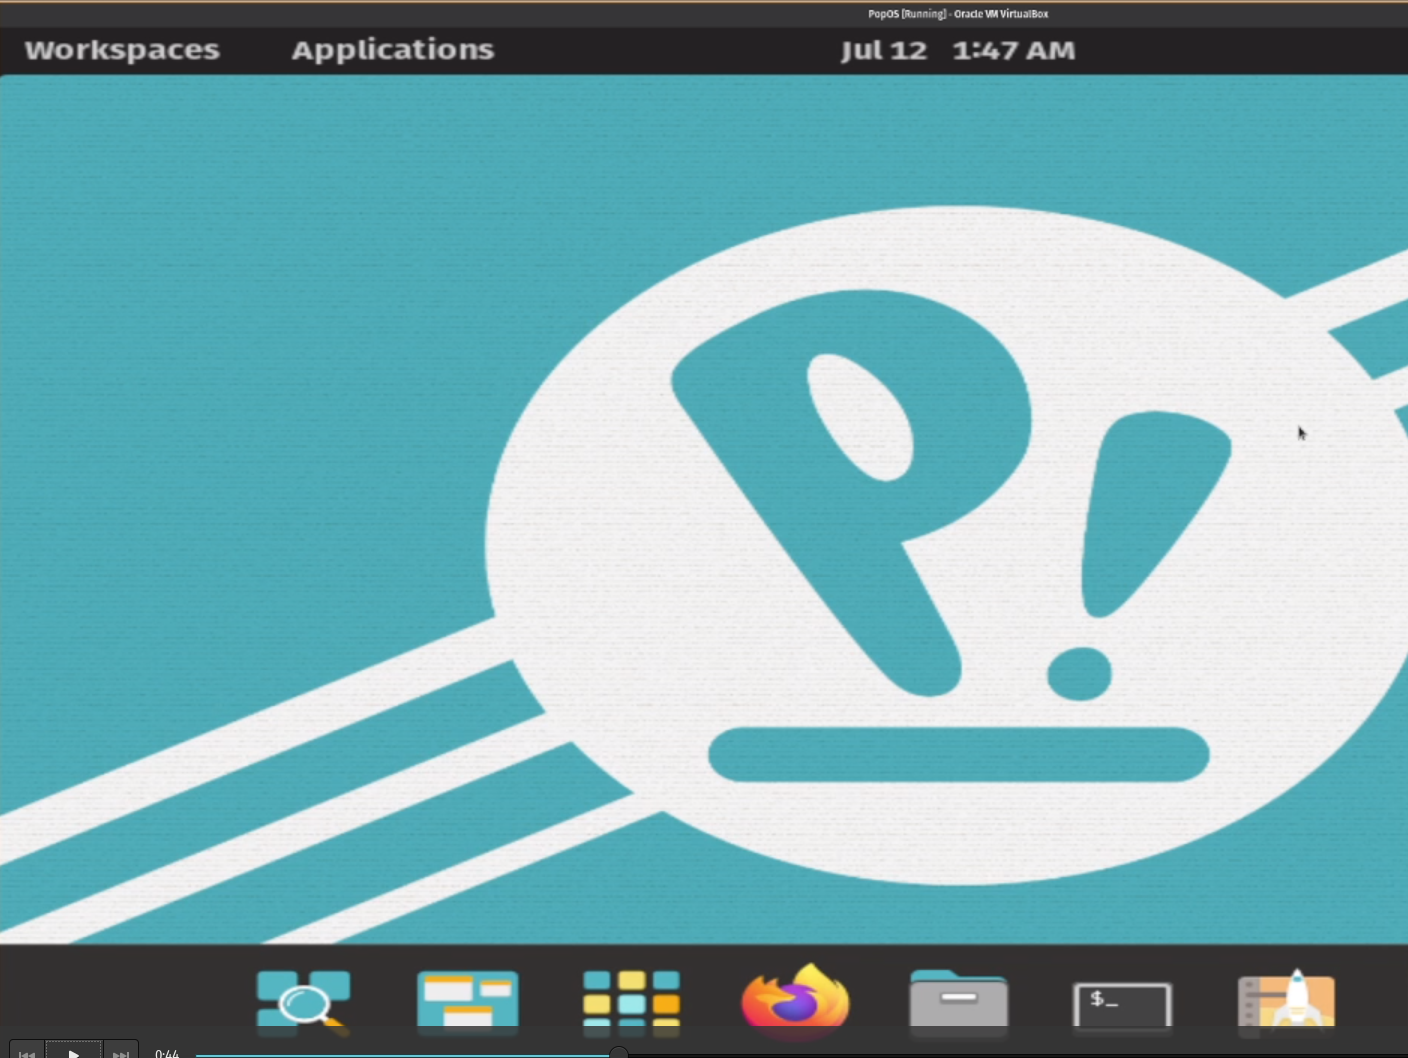
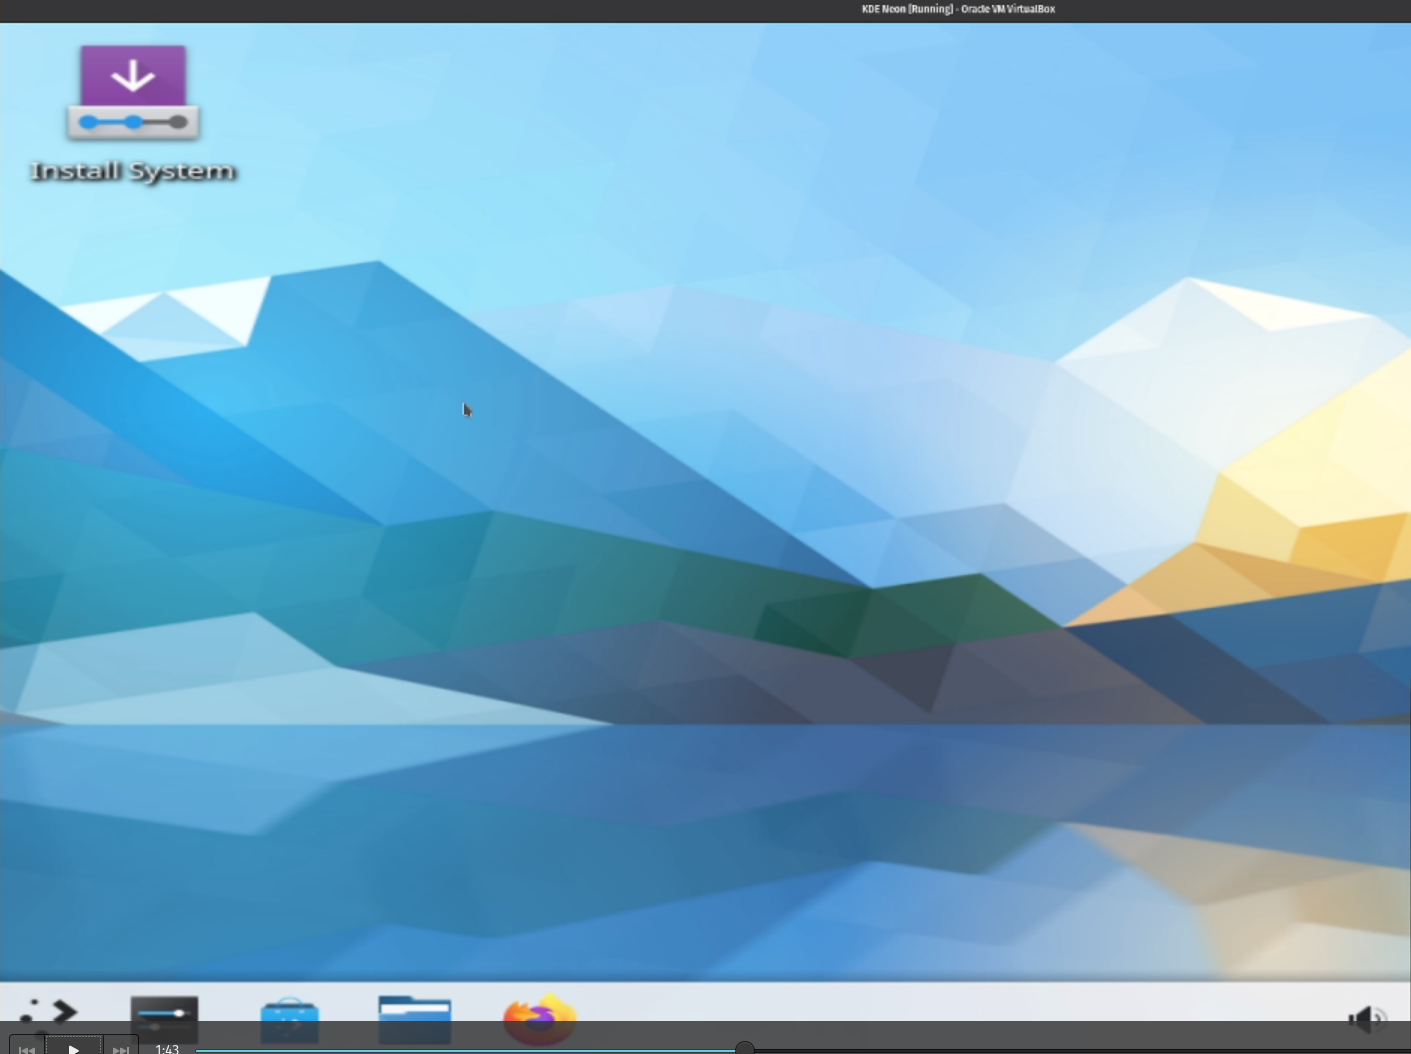
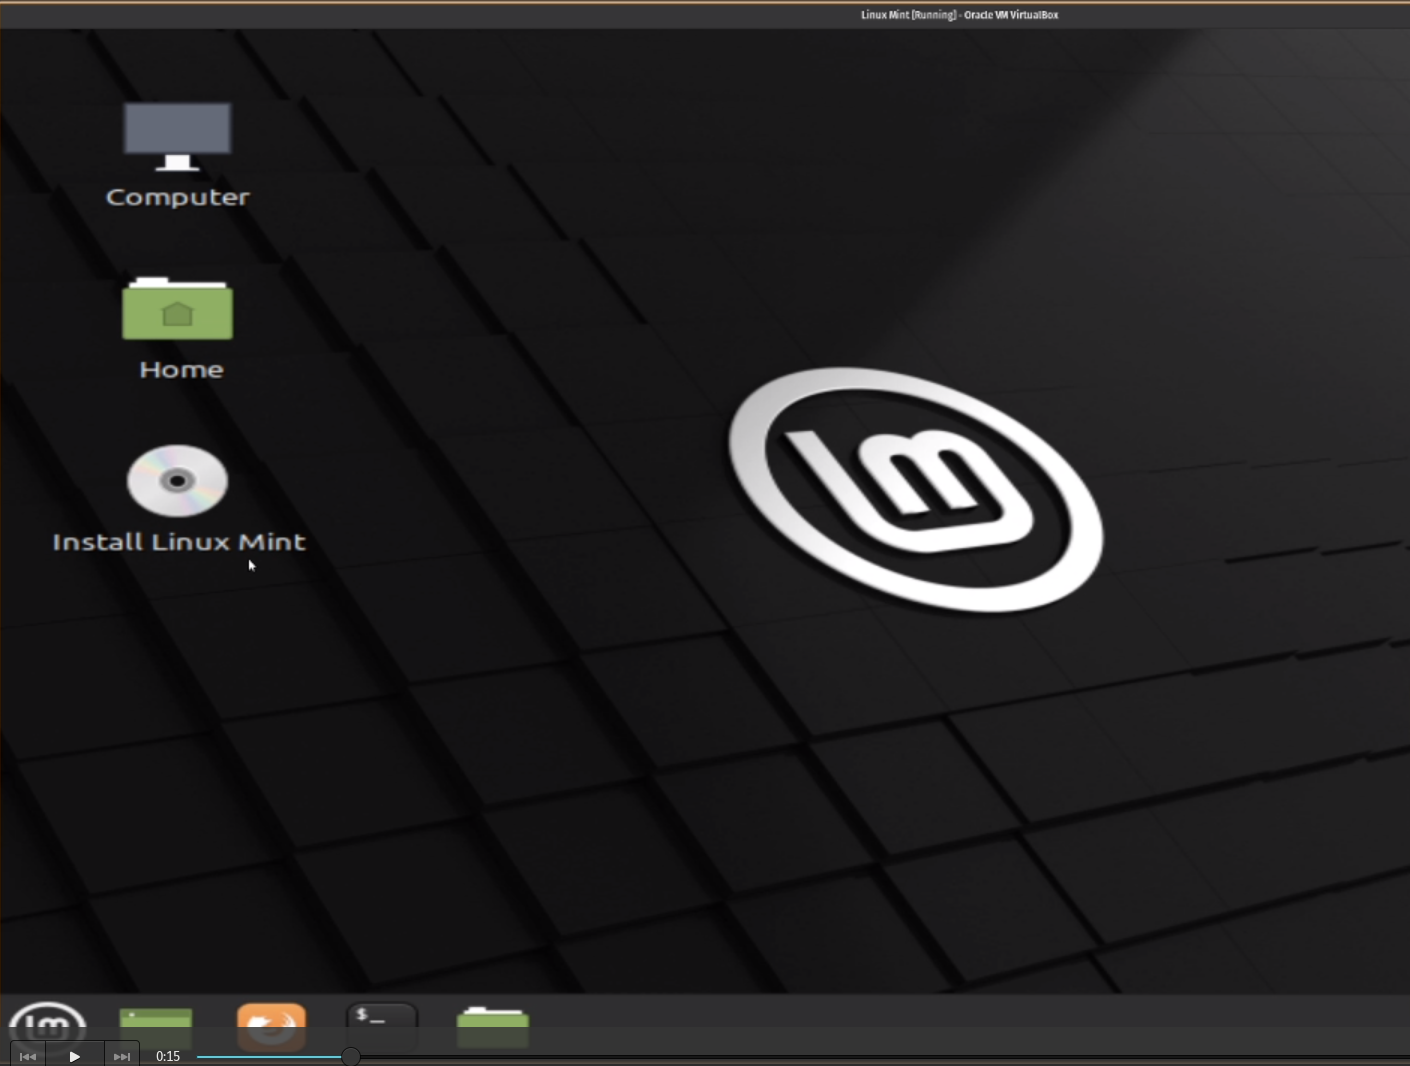
Reaching The Desktop
After booting into the system you'll see a desktop with the install already open. It'll look similar to the below. You'll see the installer at the top! It may even pop up on the screen.
Optional: Checking Compatibility
If you followed along with the Linux Ready Machine At this point you can skip this section and go directly to the next Installing Linux section.
You could also minimize the installer and run a hardware probe instead to see what all devices are recognized and work.
 linuxhw
Running The Hardware Probe
First, open the terminal so we can type in the following commands.
Opening The Terminal
Pop!_OS:
- Press (Windows Key + T) together
KDE Neon:
- Hit the Windows Key, then type in 'Konsole', press enter when it pops up as a result.
Linux Mint:
- Press CTRL + ALT + T together
Install the Hardware Probe Program
Type in the following commands in the terminal.
sudo add-apt-repository universe sudo apt-get update sudo apt-get install hw-probe --no-install-recommends
Then run the hardware probe!
Type in the following commands in the terminal.
sudo -E hw-probe -all -upload
After a short time, you will be given a link to the results of your probe!
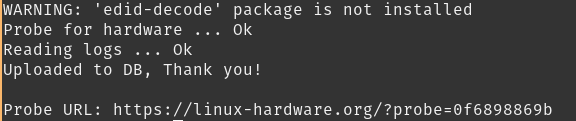
Reading your hardware probe
You'll see a list of your device's driers and components, you will see three statuses.
- Detected
- Works
- Malfunc
You should be good if you see detected & works. If you see something malfunction, look up what driver it is and what it could effect on your computer. Install it if you're willing to live without that component, or see if you can find an installable driver online. Lastly, don't be afraid to ask in our Official Telegram Channel.
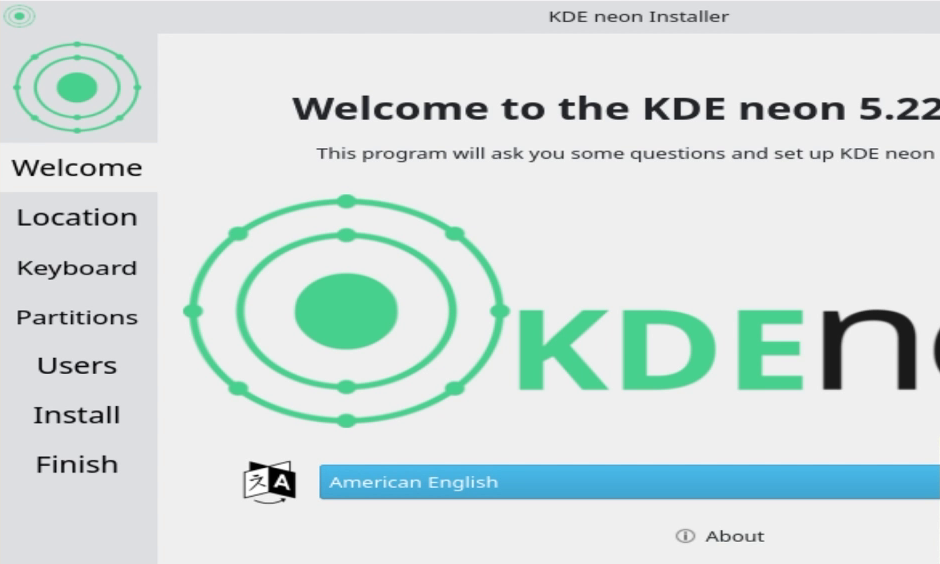
Installing Linux
If the installer window isn't open, click the installer shortcut on the desktop. Your install should look different depending on the operating system, but it will prompt you to continue.
Continue
Keyboard Layout
If you need to change the keyboard layout you can do it at this step, otherwise continue.
Download Updates & Other Software
If you've connected to a Wifi network you can download updates during the installation. Here you may also choose to install third-party software.
POINT OF NO RETURN
After this next step, your existing computer will be wiped.
Please make sure there is nothing you need from this computer. If you mess up the installation, you can always retry the Linux installation process, but you will never get the existing Windows operating system back.
Choose Installation Method
If you are new to Linux or not technically resourceful, we recommend you "Erase disk and install...". This will replace the existing data on the machine with your new operating system. This is the easiest and fastest way to move to Linux.
You screen will look similar to the following.
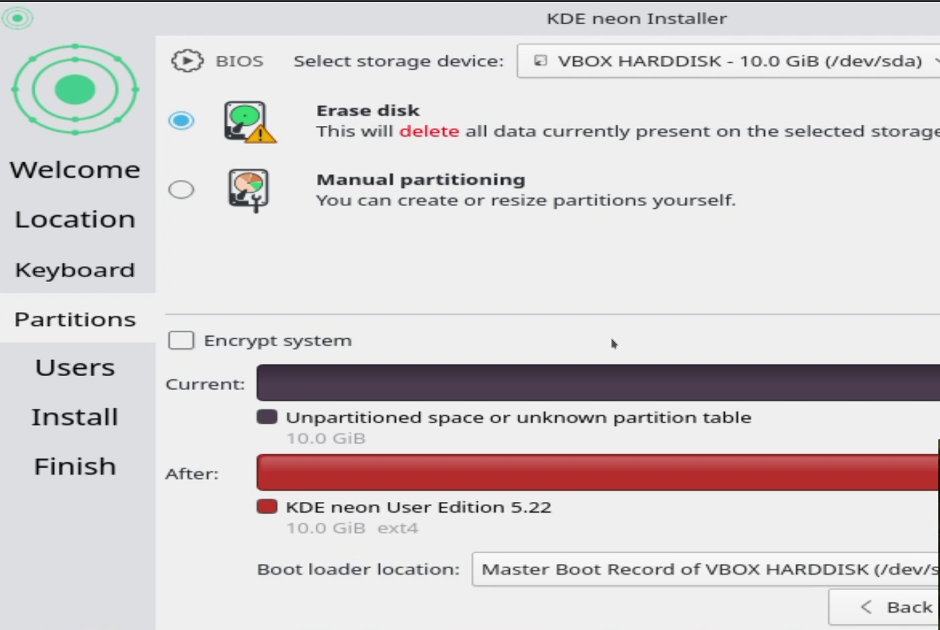
If you want to create partitions for an advanced installation, please follow this guide.
Once you click next, the installation will start.
Now that the operating system is being copied onto your disk, you can configure your accounts.
Finally, you'll configure your user account on the operating system. Your user account is important, it is the username you'll use to login and it'll name the home folder that houses most of your data.
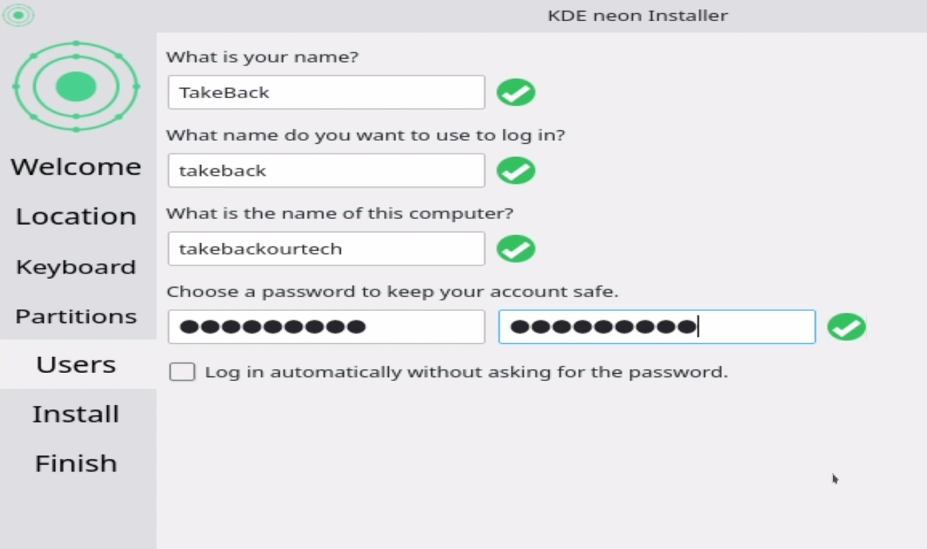
Make sure you save your account password, not only will you need it to login but you'll also use it plenty when interacting with the OS.
Its important to set the computer name here to a memorable name for your device. This is not your user account. I typically give each of my devices a nickname based on their model or style.
Now you must wait for the installation to finish and once it has, you can hit Restart now to boot directly into the new operating system install!
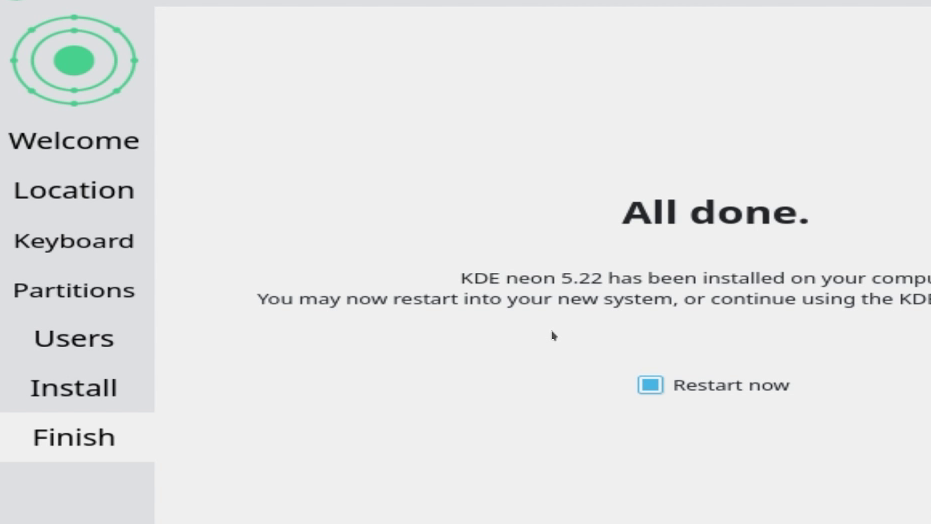
You will boot into your new OS and login with the user account and password we set.
Please join us in the next article to get our feet wet working in Linux, and learn how to install the applications you love and more!
Take Back Our Tech Newsletter
Join the newsletter to receive the latest updates in your inbox.


